Dayton Audio MA1240a Amplifier Hack
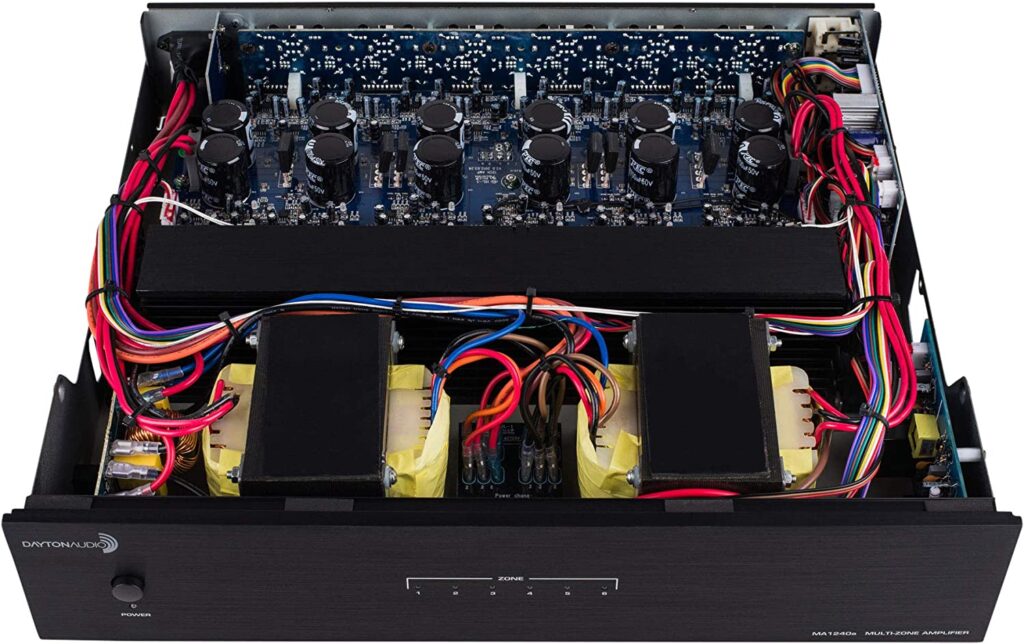
I recently bought a couple of Dayton Audio MA1240a Twelve Channel Multi-Zone Amplifiers to power the speakers I have throughout my home. What drew me to this particular amp was its fair price and the fact that it has an “Auto” setting that senses a signal on the RCA line-level inputs that is supposed to …