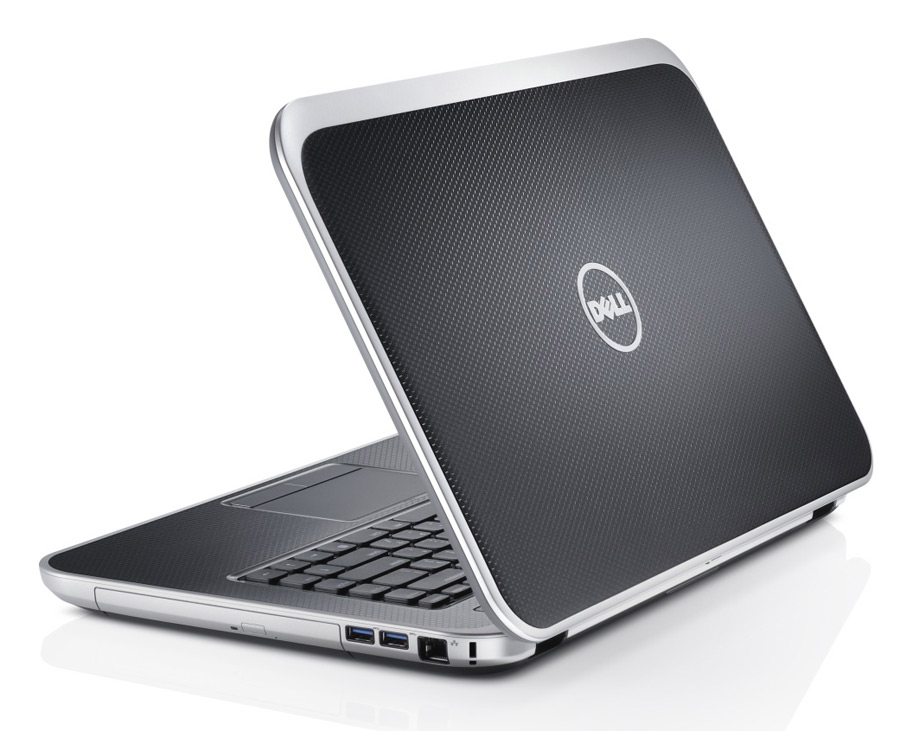
I’ve been wanting to replace my 17” Macbook with a new laptop running Linux for quite some time now. I replaced my Macbook Air with a Dell XPS 13 running Ubuntu a few months ago, and that’s been working GREAT! Unfortunately, Dell doesn’t make a 17” XPS model, so after a bit of research, I finally settled on the Dell Inspiron 17R Special Edition, also known as the Dell 7720. While the 7720 is a bit thicker than I wanted, I was really drawn to the rounded corners and the “Stealth Black” finish.
WARNING: This tutorial assumes you have a basic knowledge of Linux … issuing these commands COULD render your system inoperable … proceed with caution!

The Setup
The 7720 ships with a 32GB SSD and a 1TB HDD. I had no intentions of ever using Windows 8 so I decided to wipe the current configuration and install Ubuntu 13.04 on the SSD and to make the 1TB drive my data drive.
I started by downloading a copy of the 64Bit 13.04 Desktop iso on my Linux desktop and writing the image out to a USB Thumbdrive:
dd if=ubuntu-13.04-desktop-amd64.iso of=/dev/sdb
Now that I had a bootable USB Drive, I inserted it into an available USB slot on my new Insperion, turned on the computer and pressed F12 until the Boot Menu appeared. I then proceeded to enter setup mode, enable Legacy Boot, and then move USB booting to the top of the Boot Order. Once complete, I then saved my settings and proceeded to boot off of the USB drive into the familiar Ubuntu Linux installer. I chose to Install Ubuntu and replace Windows 8, making certain to select /dev/sdb (the SSD) as the destination.
With the Ubuntu installation complete I quickly realized that there were a few issues that needed to be addressed.
- The fan seemed to run all the time
- The touchpad was recognized as a mouse thus no multitouch
- There was no hibernate option in the shutdown menu
- My data drive wouldn’t automount thus causing Dropbox to fail
- Reboots always presented the Grub menu
1 – Fan
The first item to resolve was the fan. The fan never stopped running and was driving me crazy! It was obvious that the 7720 was running a bit hot; the question was why. A bit of poking around and I discovered that both the Intel and Nvidia video cards were running at the same time. Since the 3.8.0 Linux Kernal does not support the Nvidia Optimus adapter in the 7720, I needed to install a special kernal module that would allow me to disable it.
sudo add-apt-repository ppa:bumblebee/stable
sudo apt-get update
sudo apt-get install bbswitch
modprobe -r nouveau
sudo sh -c 'echo "blacklist nouveau" > /etc/modprobe.d/nouveau-blacklist.conf'
echo "bbswitch load_state=0" >> /etc/modules
update-initramfs -u
This change definitely results in cooler operation and a fan that still runs constantly, but often does so at a slower RPM thus making it much more tolerable.
2 – Touchpad
The 7720 ships with a newer version of the Alps touchpad that, unfortunately, is detected as a generic PS/2 style mouse. For me, this is a show-stopper; I have to have two-finger scrolling.
Fortunately, this problem can be resolved by installing a custom 3rd party driver and dkms.
Start by downloading the latest source code package from http://www.dahetral.com/public-download
Now install using the following commands:
sudo apt-get install dkms
tar -xf psmouse-alps-X.X.tbz
sudo mv usr/src/psmouse-alps-X.X/ /usr/src/psmouse-alps-X.X/
sudo dkms add psmouse/alps-X.X
sudo dkms autoinstall
sudo rmmod psmouse && sudo modprobe psmouse
Now we will find TouchPad options on the mouse settings configuration page and can enable scrolling and tapping. Since we installed the module with dkms, the driver installation should survive future kernel updates.
3 – Hibernation
It’s rare for me to reboot my computer … I almost always hibernate when I’m done. Unfortunately, a fresh Ubuntu installation does not include a menu option to hibernate.
To fix this, open a terminal window and type in the following command:
sudo vi /var/lib/polkit-1/localauthority/50-local.d/hibernate.pkla
Now, paste the following code:
[Re-enable Hibernate]
Identity=unix-user:*
Action=org.freedesktop.upower.hibernate
ResultActive=yes
Now, save your file, and restart your computer. When Ubuntu comes back up, login and set up your Power settings to Hibernate when the “lid” closes.
4 – Auto-Mount
Since my SSD is a mere 32Gb, I wanted to use my 1TB drive for my data storage, including my Dropbox storage. When I set Dropbox up, I hadn’t noticed that my Data drive wasn’t automatically being mounted, which was instantly apparent, upon my first reboot, when Dropbox complained about not being able to find its configured storage location.
To fix this, open a terminal window and type in the following:
sudo vi /etc/fstab
Now, paste the following code:
/dev/disk/by-uuid/xxxxxxxx-xxxx-xxxx-843a-271c1e1dbde8 /media/geektips/Data ext4 defaults 0 0
Now save and reboot and you’ll see that our second drive is automatically mounted and Dropbox starts without issue.
5 – Grub
Last but not least we need to fix our Boot menu. I didn’t leave a Windows partition on my rig but you may want to – just in case! If you do, Grub will present you with a menu to choose your desired boot option.
If you want to automatically boot into Linux all you need to do is tweak your configuration by opening a terminal window and typing in the following:
sudo vi /etc/default/grub
Now set the following options, save and reboot.
GRUB_HIDDEN_TIMEOUT=0
GRUB_TIMEOUT=0
Now my 7720 works very well as my Linux based Macbook replacement!
Until next time – GEEK OUT!
~GT~

Nice tutorial, thanks. There is also an alps driver for the touchpad I think?
Any further problems (or functional updates) since your post?
No other significant changes. Overall it’s been working like a charm. My only “gotcha” is the touchpad. The driver solution I’m using is certainly functional but it’s not great. Its biggest problem is around the two-finger scrolling which just doesn’t function as well as the touchpad on the Macbook, for example.